Here are some of the many parts that comes with the robot found on ebay.
Here is the actual parts list:
- 16 x Multi-functional servo bracket
- 7 x Short U-type servo bracket- 4 x Long U-type servo bracket
- 4 x Angled U-type servo bracket
- 4 x Flat servo bracket
- 4 x L-type servo bracket
- 1 x U-type robot waist bracket (not pictured, I made my own)
- 2 x Foot Base
- 14 x Miniature Ball Radial Bearing
- 17 x Metal Servo Horn Flange
- 1 x Screw and nut set
You will also need flanges, bearings and lots of screws. Do not use the pictured 16 channel servo controller you will need a 32 channel servo controller.
Here is how to assemble the feet. Use the flat head M4 screws as seen on the right side.
There are two ways to mount the bearing as seen on the left in the above picture. You can put the screw in first and then bend the "U" metal bracket over the screw and bearing. The other way is to use tweezers to hold the nut in place and then put the screw in as seen above.
When I started I used the wrong screws to hold the servo's in place. You are supposed to use the M4 screws (A little bigger than a 6-32 screw) but I used the M3 screws (about the size of a 4-40 screw) instead. I am in the process of changing all of the servo mounting screws. Also my guess is that the four screws used to hold the servo flange to the "U" bracket are supposed to be flat head screws. The rounded or pan head screws are for the center of the flange to fasten it to the servo.
I am making my own breast plate that looks better than one made out of small parts. It is made out of a left over 4 inch piece of 3 inch "C" channel removed from a 19 inch rack.
Here is the completed and painted chest piece.
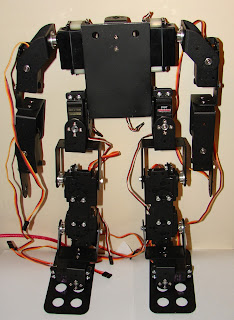
I have assembled the robot with the home made chest. I used 1/2 inch spacers to move the shoulder servo's out to where the head mounting bracket fits between them. Note that I only used 4 servo's per leg, I think that is all that is needed.


3 comments:
I am developing a project like that, I am a student of electrical engineering, I could not get him to walk well, I have problems with
angles, my robot walks forward, backwards, you could send me your code, please. to visualize the angles and make corrections in my project. ahmedalshora123@gmail.com
I am developing a project like that, I am a student of electrical engineering, I could not get him to walk well, I have problems with
angles, my robot walks forward, backwards, you could send me your code, please. to visualize the angles and make corrections in my project. ahmedalshora123@gmail.com
My code is on my book "Arduino Servo Projects".
Post a Comment